VALCUCINE-LONDON > LAYOUTS
Kitchen Layouts
Each kitchen is a unique, modular project that can be customised to suit ones own requirements and tastes, practical needs and space.
To better enjoy the kitchen it is necessary to design it in every aspect, whether macro or micro .
Kitchens with islands or peninsula units, corner or straight kitchen layouts: find out how to design the one that suits your needs best.


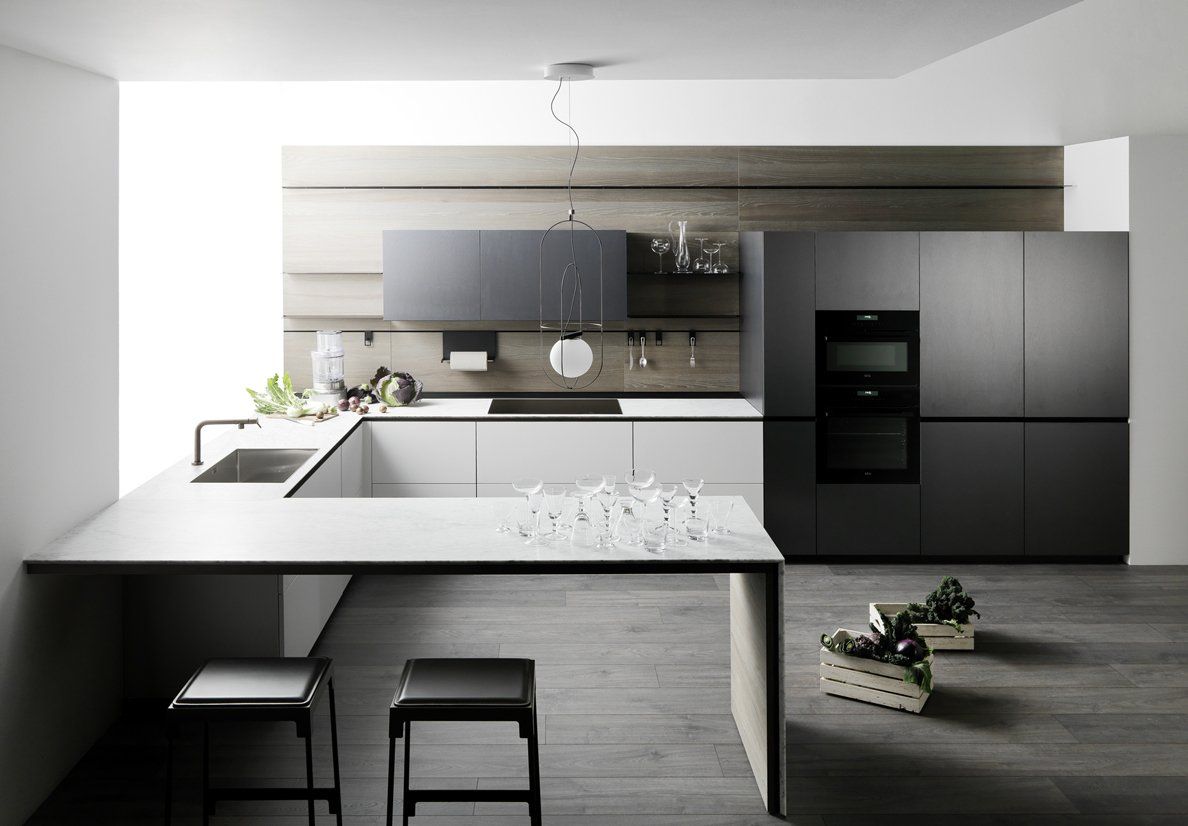
Kitchen with an island
Visual and movement freedom
It requires a lot of space and, if a sink and a hob are fitted as well as the worktop, it requires very detailed planning of the electric and plumbing systems
The perspective view clearly reveals the most significant features of this new arrangement with an island. It is complete from a functional viewpoint: as well as the hob, the worktop and the sink, it has a breakfast bar and a back section with various accessories. Clean lines, pure volumes, light materials and an advanced ergonomic study distinguish this project. The island hood with its steel casing has a horizontal glass panel and a front one that together contain and convey the cooking fumes and protect the breakfast bar when cooking.


Corner kitchen
Continuity to reduce distances
The elements are installed along two adjoining kitchen walls. The sink, the hob and the fridge must be relatively near to each other so as to reduce distances and make it easier to carry out various kitchen chores.
Due to the fact that it is arranged on two adjoining sides, the corner kitchen must be planned by creating logical connections between the various functional areas to make work in the kitchen run as smoothly as possible. A perspective view shows the real space, allowing you to assess the position of the single elements, the colour scheme, the combination of materials and the lighting.
The in-line kitchen
Harmony in the toughest environments
This is an efficient solution for long, narrow rooms. All the kitchen cabinets are installed along one wall and a space large enough to walk around in is left on the opposite side.


Kitchen with a peninsular unit
A bridge among kitchen and living room
The peninsular unit is a handy additional unit that articulates the space in a kitchen. The projecting element can give you extra worktop space, can house a sink and/or hob and can also be fitted with a breakfast bar.
A single kitchen-living room area is becoming more and more frequent in contemporary homes. An open space has become the heart of the home, be it a loft or a bedsitter, an apartment flat or a single house.The versatility of the Valcucine programmes guarantees the possibility of personalising and constructing the living room, of integrating the functions and of co-ordinating elements, modules and materials. For example, the Valcucine wall panels can be fitted in the kitchen and in the living room or can be used as a way of visually connecting various rooms of the home. It is possible to co-ordinate the appearance of an open space arrangement by using furniture that aesthetically links the kitchen and the living room but that benefits from the specific functional elements used in each area.